You may think moving from a smartphone to a DSLR is hard. Many people your age feel the same way.
Entry-level cameras can be harder to use than expensive ones. This can make beginners feel upset. These cameras sometimes limit what you can do. It can be tough to do simple things like using fill flash outside.
You already know how to take pictures with your phone. Now, you can try new ideas and have fun learning something new. A guide for middle-aged beginner photographers: a smooth transition from smartphone to DSLR, recommended gear and settings for landscapes/family photos, and a simple post-processing workflow. This adventure can make you happy at any age.
Key Takeaways
- Moving from smartphone to DSLR photography gives you new ways to be creative. Enjoy learning and have fun taking pictures.
- Beginner DSLRs give you clear photos and are easy to use. They are great for people who want to try photography and not get confused.
- Use auto mode first on your DSLR to feel sure of yourself. Try manual settings slowly as you get better.
- Take photos often and make small goals for yourself. This helps you get better and stay excited.
- Join groups or online clubs about photography. Sharing your work and getting advice helps you learn more.
A Guide for Middle-Aged Photography Beginners: A Smooth Transition from Smartphones to DSLRs
DSLR vs. Smartphone: Key Differences
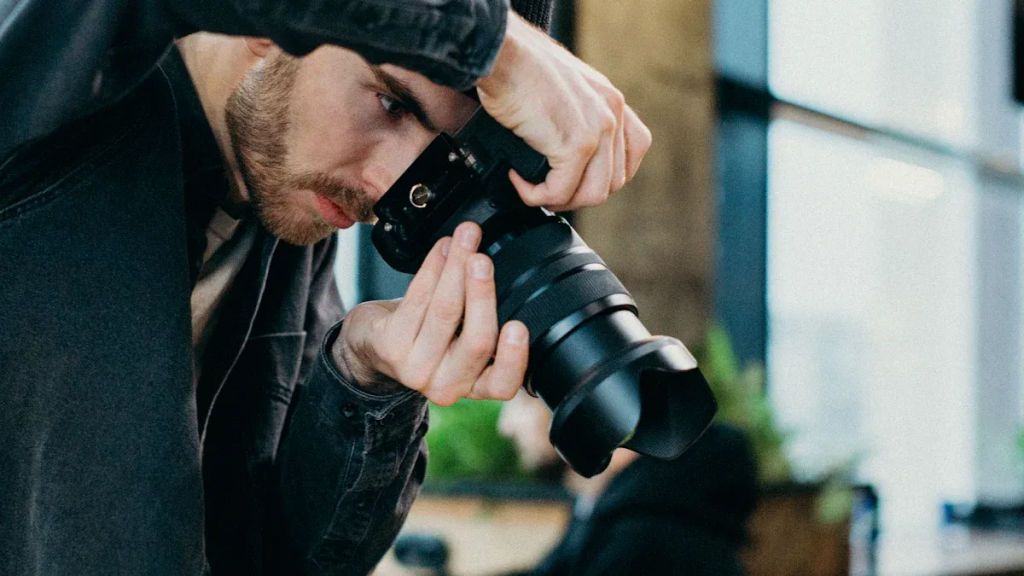
Most people use their phones for pictures. Phones are fast and simple. A DSLR looks different when you hold it. There are more buttons and dials. You may wonder about all these choices. Let’s look at what makes them different so you feel sure.
Here’s a table to help you compare:
| Feature | DSLR Cameras | Smartphones |
|---|---|---|
| Sensor Size | Larger APS-C or full-frame sensors | Smaller sensors |
| Lens Capabilities | Interchangeable lenses for flexibility | Fixed or limited lens options |
| Dynamic Range | Superior native dynamic range | Computational HDR for enhancement |
| Depth of Field Control | Better optical depth of field | Software simulation of depth |
| Image Processing | Manual control over settings | AI-driven automatic enhancements |
A DSLR has a bigger sensor. Your pictures can show more detail. They look clearer, even in dark places. You can switch lenses on a DSLR. This lets you take many kinds of photos. You can shoot landscapes, family, or close-ups. Phones use software to make pictures look nice. But they cannot match the real sharpness of a DSLR.
You get more control with a DSLR. You can change brightness, color, and focus. Your phone does this by itself. Sometimes it makes mistakes. With a DSLR, you choose how your photo looks.
Some people worry about learning new things. Phones are easy to use. DSLRs need you to learn more. Here’s a table to show you:
| Camera Type | Learning Curve Characteristics |
|---|---|
| Smartphone | Easier to use with excellent results in automatic modes; manual controls available for learning. |
| DSLR | More creative control but requires a deeper technical understanding to use effectively. |
Don’t be afraid. You can start with auto mode on your DSLR. You will learn more as you practice. A guide for middle-aged beginner photographers: a smooth transition from smartphone to DSLR, recommended gear and settings for landscapes/family photos, and a simple post-processing workflow. helps you take small steps and enjoy learning.
Tip: Take the same picture with your phone and DSLR. Look at the detail and color. You will see how strong your new camera is.
Why Choose an Entry-Level DSLR
You may ask, “Why not buy a fancy camera?” Entry-level DSLRs are great for beginners. They are good if you want to focus on A guide for middle-aged beginner photographers: a smooth transition from smartphone to DSLR, recommended gear and settings for landscapes/family photos, and a simple post-processing workflow.. These cameras give you nice photos. They are not too heavy or hard to use.
Here’s why entry-level DSLRs are smart:
| Feature | Description |
|---|---|
| Solid Image Quality | Captures sharp, high-resolution images in various lighting conditions. |
| Reliable Autofocus | Fast autofocus helps in capturing clear shots, especially of moving subjects. |
| User-Friendly Interface | Intuitive designs and accessible controls make it easy for beginners to navigate and use. |
| Good Battery Life | Ensures the camera lasts through a full day of shooting without needing a recharge. |
| Lightweight Design | Easy to carry for long sessions or travel, enhancing portability for beginners. |
| Tilting LCD Screen | Allows for creative compositions and unique angles, beneficial for vlogging and selfies. |
You get sharp pictures, even if you are new. The camera focuses fast. You won’t miss smiles or sunsets. The menus are easy. You can find things quickly. The battery lasts all day. You can take pictures without worry.
Entry-level DSLRs are light. You can carry them on walks or trips. Some have screens that tilt. This helps you take fun shots or selfies.
Popular beginner models are:
- Nikon D80
- Nikon D50
- Nikon D40
- Nikon D200
- Sony Alpha A100
- Canon EOS 20D
- Nikon D70S
- Canon EOS 30D
You do not need the newest camera. These models work well for A guide for middle-aged beginner photographers: a smooth transition from smartphone to DSLR, recommended gear and settings for landscapes/family photos, and a simple post-processing workflow.. You can start with any and get great photos.
Remember, the goal is to have fun. You will learn new things and save memories. Take your time. Practice with your camera. You will get better every day.
Choosing the Right Camera and Lens
Essential Features for Beginners
You want a camera that feels easy to use. You also want one that helps you grow as a photographer. Here are some features you should look for:
- Manual Control: You can change settings like aperture, shutter speed, and ISO. This gives you creative power over your photos.
- Image Quality: A DSLR has a bigger sensor than your phone. Your pictures will look sharp, even in low light.
- Interchangeable Lenses: You can try different lenses for different scenes. This makes your camera more flexible.
- Optical Viewfinder: You see the real scene through the lens. This helps you frame and focus your shot.
- Speed and Responsiveness: DSLRs react fast. You can catch quick moments, like a child’s smile or a bird flying.
Tip: Start with auto mode. As you get comfortable, try changing one setting at a time.
Lenses That Mimic Smartphone Views
You may wonder which lens feels most like your phone camera. Most smartphones use a wide lens. If you want your DSLR to match, look at this table:
| Smartphone Model | Native Focal Length | Approximate Equivalent Lens |
|---|---|---|
| iPhone 13 | 26mm | 35mm (zoom 1.3x) |
| Samsung Galaxy | 23mm | 35mm (zoom 1.3x) |
A 35mm lens on your DSLR gives you a view close to your phone. This makes the switch feel smooth. You will find it easy to frame family or landscape shots.
Budget-Friendly Starter Kits
You do not need to spend a lot to get started. Many brands offer kits with a camera body and a basic lens. These kits often include an 18-55mm lens. This lens works well for most scenes. You can take portraits, landscapes, and everyday moments.
Look for deals on used gear. Older models still take great photos. You can save money and still enjoy all the key features. Remember, the best camera is the one you use often. Pick a kit that feels good in your hands and fits your budget.
Note: Ask for help at a camera store. Hold the camera and see if it feels comfortable. This will help you make a smart choice.
Getting Started: Assembly and Handling
Setting Up Your DSLR
You just got your DSLR. You want to start shooting, but first, you need to set it up. Take the camera body and lens out of the box. Hold the camera steady. Line up the marks on the lens and camera. Twist the lens gently until you hear a click. Now, your lens is secure.
Insert the battery into the slot. Make sure it fits snugly. Slide in your memory card. You will find the slot on the side or bottom. Turn on the camera. The screen lights up. You can set the date and time. This helps you organize your photos later.
Check the mode dial. Set it to “Auto” for your first shots. You can explore other modes as you get comfortable. Look through the viewfinder. Adjust the strap so the camera hangs safely around your neck. You are ready to take your first photo!
Tip: Practice attaching and removing the lens a few times. You will feel more confident each time.
Safe Handling and Maintenance
You want your camera to last for years. Good habits help you avoid problems. Always use the strap when you walk or shoot outside. Hold the camera with both hands. Keep it away from water and dust.
Here are some easy routines to keep your DSLR in top shape:
- Take test shots of plain surfaces. You can spot dust or debris early.
- Create a cleaning schedule. Adjust it based on how often and where you shoot.
- Clean the sensor before big shoots. This keeps your photos sharp.
- Wipe down your camera after outdoor sessions. Dust can settle quickly.
- Keep a cleaning kit handy. You can fix small issues right away.
- Learn safe cleaning techniques. You will feel more confident and avoid damage.
- Watch your image quality during shoots. If you see spots, clean the sensor.
- Pack cleaning tools when you travel. You never know what conditions you’ll face.
- Write down cleaning dates and notes. This helps you track your routine.
Note: If you feel unsure about cleaning the sensor, ask for help at a camera store. You can also find videos online that show safe methods.
You can keep your camera working well with these simple steps. Regular care means you spend more time taking great photos and less time worrying about problems.
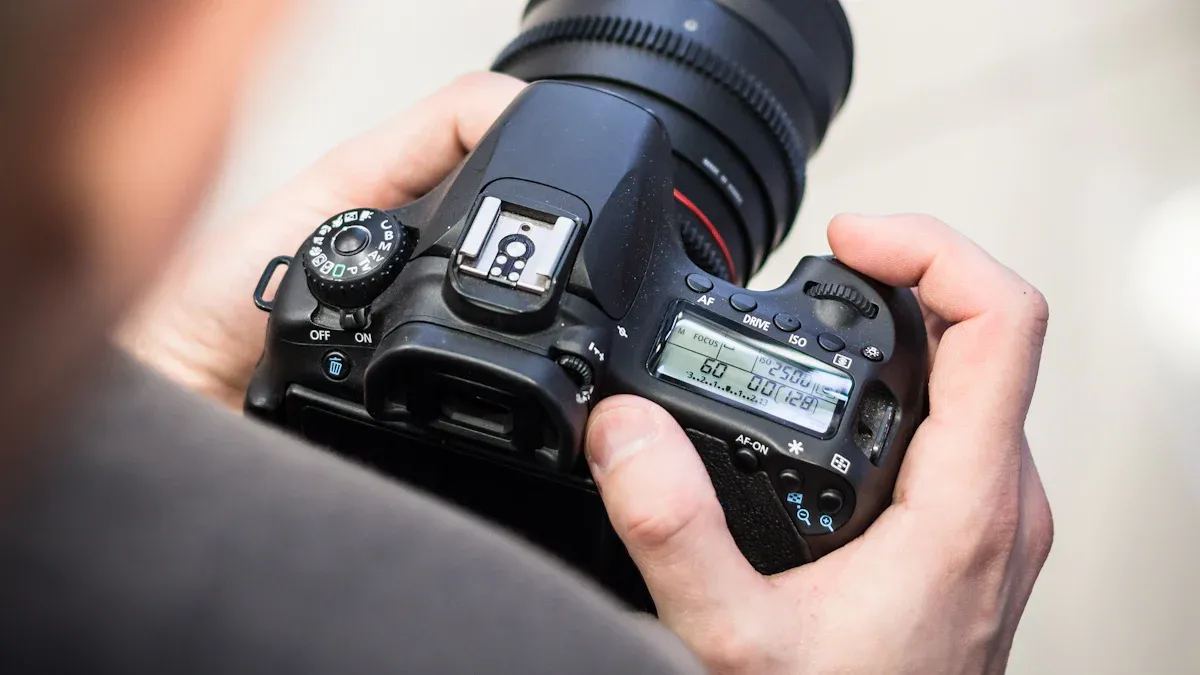
Basic Camera Settings and Controls
Aperture, Shutter Speed, ISO Explained
When you use a DSLR, you control three main settings: aperture, shutter speed, and ISO. Think of these as the tools that shape every photo you take. Imagine you are collecting rain in a bucket. The width of the bucket, how long you leave it out, and how much rain falls all change how much water you get. In photography, these settings work the same way to control light and image quality.
- Aperture: This is like the size of the bucket. A low number (like f/1.4) gives you a wide opening, which blurs the background and makes your subject stand out. A higher number (like f/8) keeps more of the scene in focus.
- Shutter Speed: This is how long you leave the bucket out. A fast shutter (like 1/1000s) freezes action, while a slow shutter (like 1/15s) lets in more light but can blur moving things.
- ISO: This is how sensitive your camera is to light. A low ISO (like 100) keeps your photo clean and sharp. A high ISO (like 6400) brightens dark scenes but can make your photo look grainy.
Shooting Modes for Beginners
Your DSLR has different shooting modes to help you learn. You can start with these:
- Auto Mode: The camera picks all the settings for you. Great for quick shots.
- Portrait Mode: Makes faces look soft and the background blurry.
- Landscape Mode: Keeps everything sharp, perfect for scenery.
- Sports Mode: Uses a fast shutter to freeze action.
- Manual Mode: You pick all the settings. Try this when you feel ready to experiment.
Tip: Start with Auto or Portrait mode. Switch to Manual when you want more control.
Focus and White Balance Basics
Getting sharp photos and true colors is easy when you know what to check:
- Use autofocus for most shots. Press the shutter halfway to let the camera focus.
- For white balance, pick a preset that matches your light. Use “daylight” for sunny days, “cloudy” for overcast, or “flash” if you use the camera’s flash.
- If your camera lets you, set the temperature to around 5,000K for outdoor shots.
- Make sure your flash and the light around you match in color. This keeps your photos looking natural.
Note: Try different white balance settings and see how the colors change. You will learn what looks best for each scene.
Equipment and parameters for shooting landscapes/family scenes
Best Gear for Landscapes and Family Photos
You want to capture beautiful landscapes and family moments. The right gear makes this easier. Wide-angle lenses help you fit more scenery into your shot. Zoom lenses let you get closer to your subject without moving. Prime lenses give you sharp images and work well for portraits. Cleaning supplies keep your camera in top shape.
Here’s a quick look at some popular choices for beginners:
| Lens Type | Model Name | Price |
|---|---|---|
| Wide-Angle Lens | Tamron SP 24-70mm F/2.8 Di VC USD G2 (Nikon) | $1,199.00 |
| Tamron SP 24-70mm F/2.8 Di VC USD G2 (Canon) | $1,199.00 | |
| Tamron 28-75mm F/2.8 Di III VXD G2 (Sony) | $899.00 | |
| Zoom Lens | Tamron SP 70-200mm F/2.8 Di VC G2 (Nikon) | $1,199.00 |
| Tamron SP 70-200mm F/2.8 Di VC G2 (Canon) | $1,199.00 | |
| Tamron 70-180mm F/2.8 Di III VXD (Sony) | $1,199.00 | |
| Prime Lens | Peak Design Capture Camera Clip V3 | $74.95 |
| Cleaning Supplies | Camera sensor swabs and microfiber cleaning cloths | N/A |
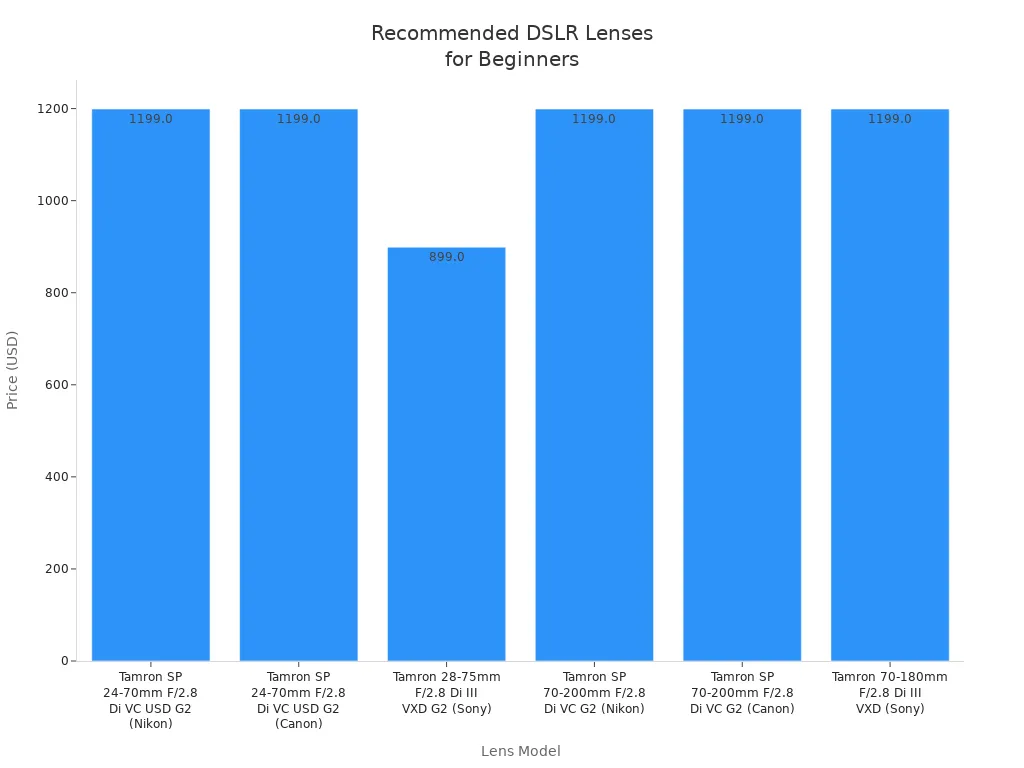
Tip: Start with a wide-angle lens for landscapes. Use a zoom or prime lens for family portraits. Cleaning your gear keeps your photos clear.
Recommended Settings for Common Subjects
You want your photos to look sharp and vibrant. Try these settings for the best results:
- Use Aperture Priority Mode (A) for landscapes. This keeps everything in focus.
- Set your aperture to f/8 or higher for scenery. Your photo will look crisp from front to back.
- For family portraits, choose a lower aperture like f/2.8. This blurs the background and makes faces stand out.
- Adjust ISO to match the light. Use ISO 100 in bright daylight. Raise it if you shoot indoors.
- Manual Mode gives you full control. Try it when you feel ready.
Note: Practice with these settings on familiar subjects. You will see your skills improve quickly.
Tips for Practicing and Building Confidence
You might feel nervous at first. That’s normal. Here are some ways to build confidence:
- Practice often. Take photos of your family and local scenery.
- Learn from professionals. Watch online videos or join a workshop.
- Look back at your old photos. Notice how much you improve.
- Stay open to feedback. Try new ideas and learn from mistakes.
- Set small goals. Aim to capture a sunset or a family smile each week.
A guide for middle-aged beginner photographers: a smooth transition from smartphone to DSLR, recommended gear and settings for landscapes/family photos, and a simple post-processing workflow. helps you take small steps and enjoy every moment. You will see progress with each photo you take.
Shooting Tips for Middle-Aged Beginners
Composition Made Simple
You want your photos to stand out. Good composition helps you do that. Try these easy techniques:
- Rule of Thirds: Imagine a grid with nine squares on your screen. Place your subject where the lines cross. This makes your photo more interesting.
- Centered Composition: Put your subject in the middle if the scene looks balanced or symmetrical. This works well for portraits or buildings.
- Framing: Use objects like doors, windows, or trees to frame your subject. This draws attention right where you want it.
- Leading Lines: Look for lines in the scene, like roads or fences. These lines guide the viewer’s eyes to your main subject.
- Fill the Frame: Move closer to your subject. You create a stronger impact and remove distractions.
- Simplicity: Keep your photo clean. Focus on one main subject and avoid clutter.
Tip: Before you press the shutter, check the edges of your frame. Make sure nothing important gets cut off.
Avoiding Common Mistakes
Everyone makes mistakes when starting out. You can avoid many of them with a few simple checks:
- Cropping Issues: Sometimes you cut off parts of your subject, like hands or tails. Always look at the edges before you shoot.
- Wrong Exposure: Photos can turn out too bright or too dark. Use the exposure compensation button to fix this. Try different metering modes to see what works best.
- Clipping Highlights and Shadows: You might lose details in very bright or dark areas. Check your camera’s histogram to make sure you keep all the details.
Note: Review your photos after each shoot. You will spot patterns and learn faster.
Practice Projects for Skill Building
You build skills by practicing often. Fun projects help you stay motivated:
- 365 Photography Challenge: Take one photo every day for a year. You will see big improvements.
- 52-Week Photography Challenge: Try a new theme or technique each week. This keeps things fresh.
- 30-Minute Photography Challenge: Set a timer and shoot as many creative photos as you can in half an hour.
- Weekend Photography Challenge: Spend your weekends exploring new places and subjects.
- A-Z Photography Challenge: Find something for every letter of the alphabet. This sparks creativity.
😊 Pick a challenge that excites you. Share your favorite shots with friends or family. You will enjoy the journey and see your progress.
Simple workflow for post-production
Simple Editing Software for Beginners
You just took some nice photos with your DSLR. You want to make them look better. Editing does not have to be hard. Many programs are easy for beginners. You can crop, brighten, and fix colors fast. Here’s a table to help you compare easy editing software:
| Software | User-Friendly Features | Price Options |
|---|---|---|
| ON1 Photo RAW | Easy to use, smart tools, safe editing, all-in-one program | Cheap, flexible choices |
| Adobe Lightroom | Simple design, works with RAW files, helps organize photos | Pay each month if you want |
| Affinity Photo | Simple look, lots of editing tools, supports RAW files | Pay once and own it |
| Corel PaintShop | Easy to use, smart AI tools, strong editing features | Free version you can try |
| Capture One | Works with many photo types, uses layers, edits fast | Pay each month if you want |
You can start with ON1 Photo RAW or Adobe Lightroom. Both let you change brightness, contrast, and color. If you want to pay once, Affinity Photo is good. Try Corel PaintShop if you want to practice for free. Capture One is fast and lets you use layers.
Tip: Pick one program and learn the basics first. You do not need every tool right away.
Organizing and Sharing Your Photos
You want your photos safe and easy to find. Organizing helps you enjoy memories and share with friends. Follow these easy steps:
- Make folders for your photos. Use names like “Family 2026” or “Vacation Landscapes.”
- Put all your old digital photos in these folders.
- Scan and sort any old printed photos or negatives.
- Back up your computer. Use an extra hard drive or cloud storage.
- Choose your favorite photos and show them off. You can print, make slideshows, or share online.
😊 Sharing your best photos feels great. You can inspire others and celebrate your progress.
A guide for middle-aged beginner photographers: a smooth transition from smartphone to DSLR, recommended gear and settings for landscapes/family photos, and a simple post-processing workflow. helps you take small steps in editing and organizing. You will find joy in every part of the process.
Community and Continued Learning

Joining Photography Groups
You do not have to learn photography alone. Many people feel more confident when they join a group. Photography groups welcome beginners and help you meet others who share your interest. You can find local clubs in your city or online communities on social media. These groups often organize photo walks, friendly contests, and workshops. You get to ask questions, share your photos, and learn from others’ experiences.
Tip: Search for groups that match your favorite subjects, like landscapes or family portraits. You will find it easier to connect with people who enjoy the same things.
When you join a group, you see how others solve problems. You might discover new places to take pictures. You can also get feedback on your photos. This helps you improve faster and keeps you motivated.
Setting Goals and Tracking Progress
Setting clear goals makes your photography journey more rewarding. You know what you want to achieve, and you can see how far you have come. Here are some simple strategies to help you set and track your goals:
- Define Specific Goals: Write down what you want to learn. For example, you might say, “I want to master using aperture for portraits.”
- Make Goals Measurable: Choose goals you can track. You could decide to take ten portraits using different aperture settings.
- Set Regular Review Intervals: Check your progress every week or month. This helps you see what works and what needs more practice.
- Use a Journal or Spreadsheet: Keep notes about your goals and your progress. You can use a notebook or a computer.
- Try Goal-Tracking Apps: Apps like Trello or Habitica help you organize your tasks and celebrate your achievements.
- Be Honest with Yourself: Look at your photos and think about what you like and what you want to change.
- Celebrate Small Wins: Give yourself credit for every step forward. Even small improvements matter.
Remember: Every photo you take is a step toward your goals. Enjoy the process and keep learning.
You’ve learned the basics—now grab your camera and start shooting! Try different modes, play with settings, and take photos often. Mistakes will happen, but that’s how you grow. Join a local group or sign up for a workshop to meet others and get feedback. Set small goals and track your progress. Most of all, enjoy the creative journey. Every photo brings you closer to your own style. 📸
FAQ
How do I know which DSLR camera is right for me?
You should visit a camera store and hold different models. See which one feels comfortable. Ask for advice from staff. Try entry-level models first. You can always upgrade later.
Can I use my old lenses with a new DSLR?
Check your camera’s brand and lens mount. Some older lenses fit new cameras. Ask at the store or search online for compatibility. You might need an adapter.
How do I avoid blurry photos?
Hold your camera steady. Use autofocus. Try a faster shutter speed. If you shoot indoors, raise the ISO. Practice often. You will see improvement.
What is the best way to learn DSLR photography?
Start with auto mode. Watch online tutorials. Join a local group. Take photos every week. Ask for feedback. You will learn faster by practicing and sharing.


