Educational overview only. Prudent Guardian (www.inspirecodingedu.com) is not an insurance company, broker, law firm, or registered investment adviser, and does not provide personalized insurance, investment, tax, medical, or legal advice. Verify details with licensed professionals and official issuers.
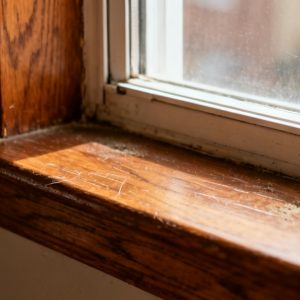
Drops are on the wood. The sash is not fully down. You brush a bead of water off the oak with the back of your wrist, and a cold draft nips at your knuckle when you lean closer to the frame. The rain outside picks up, tapping hard enough against the glass that you can hear it through the closed hallway window two doors down from yours. You don’t have time to grab a full toolkit from your apartment, just the small flathead screwdriver you keep in your hoodie pocket for quick, on-the-go fixes around the building.
Worn rubber weatherstripping
You run your finger along the bottom edge of the sash where it meets the sill, and you feel the cracked, crumbly bits of old black weatherstripping sticking out from the narrow groove cut into the wood. It’s degraded from years of harsh summer sun exposure and sudden winter temperature swings, so it can’t form a tight, water-resistant seal even when the sash is pressed all the way down into the frame. You pluck a few loose, flaky pieces out, and they crumble into tiny black flecks that land on the damp sill below you, mixing with the small puddle of rain that’s accumulated right under the sash gap. You know you can’t replace the full strip right now, since you don’t have a new roll handy, but you can work around the damaged parts for the time being to stop the leak immediately.

Bent sash lock latch
You flip the silver metal lock lever back and forth a few times, and you can see it catches on the matching strike plate half an inch above where it should click securely into place. You remember one of the kids from the third floor slammed this window shut too hard last month when they were waiting for their parent to get home from work, bending the thin metal edge of the strike plate just enough to create the tiny gap that’s letting rain seep through right now. You don’t need to replace the entire lock assembly right now, just adjust the strike plate enough to get the sash closed tight until you can grab a replacement part from the hardware store later this week. The bend is so small that you might not have noticed it if you weren’t looking for the source of the leak, but even a 1/8 inch gap is enough to let a surprising amount of water seep through during a heavy downpour like this one.
Fast temporary fix steps
You don’t need any fancy tools for this quick repair, just the screwdriver in your pocket, a roll of painter’s tape from the hallway utility closet, and a paper towel from the dispenser outside your door. Follow these steps to stop the leak in under two minutes:
- Wedge the flat end of your screwdriver under the bent lower edge of the latch strike plate, and pry it up 1/8 of an inch so the lock lever can slide under it smoothly when the sash is fully lowered. Illustrative example: If you pry it up exactly 3/32 of an inch, the lever will catch securely without leaving enough space for cold air or rain to slip through the gap around the lock assembly.
- Press both palms flat against the top rail of the sash, and lean your weight into it slowly and evenly until you hear the lock lever click into place against the adjusted strike plate. Don’t slam it down, since that could bend the strike plate further or crack the glass in the sash, which would create a much bigger problem to fix later.
- Run a 2-inch strip of blue painter’s tape along the full length of the seam where the sash meets the sill, smoothing it down firmly with your thumb to cover any remaining tiny gaps that might let water seep through around the damaged weatherstripping. You keep a roll of this tape in the hallway utility closet specifically for quick draft and leak fixes, so it only takes you 10 seconds to grab it and apply it evenly across the seam.
- Wipe the remaining standing water off the sill with the crumpled paper towel you pulled from the dispenser outside your apartment door, so the damp oak wood doesn’t start to warp or develop dark mildew spots over the next few days while the temporary fix holds.
- Hold your hand up to the full length of the seam around the sash to feel for any remaining cold drafts, and add extra pieces of tape if you feel air seeping through anywhere along the edge of the frame.
Completed work check
This is the stop: the job is done, no more work is required for right now. You step back a foot from the window and watch for a full minute as heavy rain hits the glass and runs down the pane to the sill, no new drops seeping through the taped seam. The cold draft that was nipping at your knuckles earlier is completely gone, and the sash stays locked firmly in place when you yank up on it gently to test how secure the adjusted latch is. You don’t have any more work to do here right now, so you tuck your screwdriver back into your hoodie pocket and crumple up the wet paper towel to throw away in the trash can by the building entrance when you head out tomorrow. This fix will hold for the immediate storm, though you’ll want to address the worn weatherstripping and bent strike plate when you have more free time later in the week.
Attached sill component
The small metal Sill Latch mounted to the left edge of the lower frame is what holds the sash in its lowest position when it’s fully closed, and you notice it’s still in excellent shape, no bending, rust, or loose screws on its surface. You don’t need to adjust it for this particular fix, but you make a mental note to check its two mounting screws the next time you’re working on this window to make sure they don’t come loose over time from regular use. It’s designed to keep the sash from sliding up accidentally when strong wind blows against the glass, so it’s a useful small part to keep in good working order for heavy rainstorms and cold winter days like this one. You also notice it’s easy to remove if you ever need to replace the weatherstripping under the sash, so that will make the permanent fix even faster when you get to it later.
Scheduled seasonal inspection
This is the next time you do this same job, before the worst of the winter weather hits your area. You’ll do this same full check of the window sash and sill three months from now, on the first dry weekend of November, right before the sub-freezing temperatures set in and you start running your apartment heater full time. When you do this job next, you’ll take the old, crumbly weatherstripping out completely, replace it with new closed-cell foam stripping from the local hardware store, and swap out the bent strike plate for a new, heavy-duty one so you don’t need the painter’s tape as a temporary fix anymore. You’ll also wipe down the entire sill and frame with a mild dish soap and water solution to get rid of any built-up dust, dirt, or mildew that might have accumulated over the fall months, so the wood stays in good shape for years to come. When you do that next inspection, you’ll also test all the other windows in your apartment and the shared hallway to make sure none of them have similar gaps that could let cold air or rain seep through, so you can fix any small issues before they turn into bigger problems like warped wood, water damage on the hallway drywall, or higher heating bills from lost warm air. You can set a reminder on your phone for the first Saturday of November so you don’t forget to do the check, even if your schedule gets busy with work and other commitments in the coming months.